Saturday, March 8, 2014

Rockstar!

I am so excited that Arjun's band has actually started performing and they are doing such an amazing job. They were all a little nervous and a little stiff but what an amazing first two performances. Arjun has been learning to the play the guitar for about 3 years now. For the longest time he learnt on the acoustic guitar and when the band formed a few months back, he started playing the electric guitar and he found it very easy to play that. He is enjoying the performances quite a bit. I am so proud of all the kids in the band. They are little and are 9 and 10 years of age. For them to do so well in front of a big crowd is amazing.

I saw this amazing sunburst paper in the Studio Calico Sugar Rush kit and I knew that this would be perfect for Arjun's performance. I really want to use a photo with all the band members but I haven't asked the permission of all the parents. So for now it is going to be just Arjun's photo.

Here is my layout:

I used the rays in the sunburst to write some of my journaling. I always find yellow a bit challenging to use with colors. But I really like how well it goes with black and white. So I made the photo black and white and used the print and cut feature in silhouette to cut out the photo as a semi circle. I love this feature in silhouette. It let's you place the photo under the shape you want to cut perfectly. Before I knew how to use this feature, I would really struggle to do something like this. If anyone is interested to know how to use this feature, let me know. I will write a tutorial.
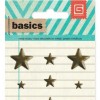
It is a very simple page. The patterned paper and the photo are pretty much what make this layout. I love the silver thickers from American crafts and the chalkboard sticker from MME. The steel stars are my all time favorite from basic grey. I added some silver sequins and the page was done.
Thanks for stopping by! Have a great day!
~Neela

SUPPLIES USED:
Saturday, March 1, 2014

This Moment

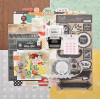
I have already mentioned in my previous posts that the Sugar Rush Kit from Studio Calico is amazing. Even though in this layout not every element is from this kit, the pink background paper, the blue paper used to mat the photo are from this kit and the stamp that says "Love this with all my heart" are from this kit. Here is  a sneak peek at all the beautiful elements from Studio Calico. Can you tell.... I am a fan!


Here is my complete layout. I clicked this photo of my kids sharing a sweet moment. There was too much going on color wise so I converted it to black and white. Once I did that, it really took away all the noise in the background and just highlighted the moment between them.

The the words on the pink background paper really did not go a 100% with the photo so I painted it with some acrylic paint to cover up most of it but I let some of the color come through because it is fantastic. I then added my blue paper on top and stitched along the border. I added my photo and this beautiful wood veneer piece below it. I added some embellishments in the circles for interest. Below it I cut a piece of water color paper and painted it pink in an ombre fashion. I then used this as my journaling block. On the left side I cut out this digital cut file from two peas with water color paper and painted it with alternating blue and pink to match the background paper and the blue paper in the front. I used wood veneer to complete my title.


Here are some close ups:


Hope you enjoyed looking at this project. I loved making it for sure. Have a great day!
~Neela

SUPPLY LIST

Thursday, February 27, 2014

Feb 28th sketch for SOUS

Hi everyone, happy Friday. Hope you are all set for the weekend to begin. Well, here is a sketch from SOUS for inspiration if you want to keep yourself busy for the weekend. It is a fun sketch. I sure had fun using it for my inspiration.


Here is my take on it. I ended up making the top right and bottom left corners the same size. I first used my hexagon mask from Studio Calico and got out my water colors. I first wanted to just spray some mists but I am happy that I changed my decision. I like the ombre effect on the hexagons that I could create with the water colors. I had a little more control on how I wanted the hexagons to look like. I then stuck the sunburst washi tape that I got in my Studio Calico Sugar Rush kit to ground the photo and the title blocks. I then used the Dear Lizzy Polka dot party frames to frame the photo, journaling and title. I got out my ever dependable stickers from Maggie Holmes Crate paper collection to embellish both the blocks. I then stuck these plastic hearts at the bottom of the photo block and the journaling block. I added my enamel dots to go with the colors in the sunburst washi and the hot pink in the stickers. After the whole project was done, I still felt that something was missing, I had backed the photo and the journaling block with a blue patterned paper and felt as if there wasn't enough blue. So I found these beautiful blue sequins in my December Daily class kit. They were a perfect match. I added them to a few of the hexagons just to get the blue in and add a little more texture.

The photo I used for this project is of my little one being a busy bee at the beach. It is as if he has so much work to do when we are at the beach. This photo was taken outside our rental house during our vacation in Hawaii last December. It was so cool to just walk out of the house and on to the beach. The kids had such a blast.
Here is a closer look at the ombre effect created by the water colors:

Here a closer look at the journaling block:

Hope you enjoyed looking at the project and hope I have inspired you in some way. Make sure to add some journaling to your projects so that you can remember the details later. Try to use water colors, they are super fun to use. I plan on using more and more of them. 
Play along the sketch contest and you will be entered to win a fun prize from our February sponsor Scraps of Darkness. You can find more details on the SOUS blog.
Have a wonderful day!
~Neela

P.S. I am excited to add the Supply List feature to my blog. This way, you can see where I get all my supplies and get a visual of the supplies used. Hope you find this useful. I always found it useful when I came across it on other blogs.
SUPPLY LIST

Monday, February 24, 2014

What do you do with feathers?

I have seen feathers being used beautifully on layouts as embellishments. Till I got this feather paper from October Afternoon in my Copper Mountain Kit from Studio Calico, I didn't own any sort of feather embellishments. A few weeks back during one of our trips to the beach, Surya found a feather and he was running up to me to show me and of course, guess what, I clicked a whole bunch of pictures with my iPhone and I knew exactly which paper I was going to use to scrap these photos. I know, scrapbooker mentalilty.... totally. 


I loved the beautiful colors on the paper. I cut out some feathers from the paper and started thinking how I should use them. I then remembered that some of my friends when we were kids, would make books with feathers stuck in them. I owned a feather or two over my lifetime but never really collected a whole bunch. But I took the inspiration from those books to make this layout. 

I divided up my layout into a grid and kept sections for photos, for embellishments, for title, for journaling and most importantly for the feathers. The background paper coordinated really well with Surya's shirt. I got this Studio Calico paper in my Sugar Rush kit.
For the base of the grid, I started off with water color paper. I painted some pink and blue colors on to it to go with my photos and colors of the feathers.
I then used a thin strip of gold striped washi tape to make the grid. I got this washi tape in my December Daily kit from Studio Calico. The alphabet stickers I used for my title are also from October Afternoon - Daily Flash.


I typed my journaling on vellum and stitched along the edges with pink and blue thread. I love enamel dots. I love the pop color they add to a page and also I like the texture they add to a page. I used enamel dots from MME and twine and ink for some fun along the edges of the photos and the edges of the layout.


I totally enjoyed making this layout. I know more pink for a boy's layout. But what to do, there are such beautiful pink products around, I just can't help myself.
Have a great day and thank you so much for stopping by!
~Neela